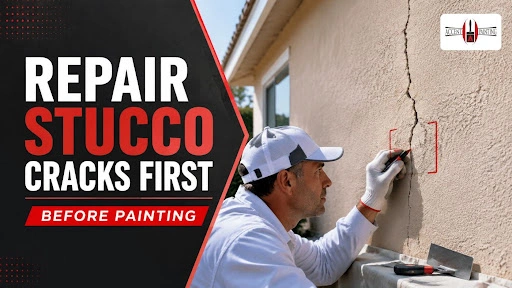
Yes, stucco cracks should usually be repaired or properly treated before painting, but the right treatment depends on the crack. A stable hairline stucco crack may only need compatible filler or a suitable high-build masonry coating, while a widening, diagonal, recurring, moisture-related, or loose area must be investigated and repaired before paint is applied.
Paint can improve color and surface protection, but it cannot stabilize failing stucco. Coating manufacturers also advise repairing cracks and other surface defects before repainting because untreated defects can show through the new finish.
Why painting over stucco cracks is usually a bad shortcut
The main problem with painting over stucco cracks is simple: paint covers the appearance of the crack without necessarily correcting the movement, poor adhesion, failed patch, or moisture problem that caused it.
The wall may look better temporarily, but the crack can remain visible beneath the coating or reopen through it. Wider cracks can also allow wind-driven rain to pass through the exterior cladding, which is why properly constructed stucco walls rely on flashing, a water-resistive barrier, drainage layers, and a weep system behind the finish.
Skipping repairs can lead to:
- Cracks reappearing through the new paint
- Uneven paint absorption around damaged areas
- Visible ridges from bad caulk or old patches
- Peeling, blistering, or localized coating failure
- Continued deterioration beneath loose stucco
- More noticeable texture differences after painting
In short: Paint should be the finishing step, not the repair material hiding an unresolved problem.
Which stucco cracks need repair before painting?
Not every line in a stucco wall means the same thing. The condition of the surrounding material, location of the crack, evidence of movement, and moisture signs matter more than width alone.
Stucco condition | Recommended response before painting | What not to do |
Stable, shallow hairline crack | Clean, inspect, and treat with a compatible crack filler, patch, or approved high-build coating | Assume ordinary finish paint will permanently bridge it |
Open or recurring crack | Remove weak material and complete a compatible stucco crack repair | Fill it with an unpaintable or incompatible sealant |
Diagonal or stair-step crack | Investigate possible movement before repainting | Diagnose the cause from appearance alone |
Crack with offset edges | Get the wall or structure evaluated before cosmetic work | Force the edges together and paint over them |
Hollow, loose, bulging, or soft stucco | Remove unstable material and repair the affected system | Coat over material that is already separating |
Crack with staining or efflorescence | Identify the moisture source before repair and painting | Treat discoloration as a paint-only problem |
Failed previous patch | Remove or correct the failed material, then match the texture | Add another layer over a patch that is lifting |
Opening at a weep screed | Confirm that it is a drainage detail and keep drainage holes clear | Caulk or paint the drainage path shut |
Exterior cladding systems are expected to manage incidental water rather than depend on the surface coating alone. At the bottom of framed stucco walls, the weep screed helps water drain out of the assembly and should not be blocked by caulk, patching material, heavy paint buildup, landscaping, or paving.
In short: Repair cracks associated with movement, loose material, moisture, or failed patches. Stable hairlines may need less invasive treatment, but they should still be included in the preparation plan.
Can you paint over hairline stucco cracks?
Sometimes, but not with ordinary paint and wishful thinking.
A fine, stable crack in otherwise solid and dry stucco may be handled during stucco surface preparation with a paintable masonry crack filler, elastomeric patch, or coating system approved for bridging small cracks. Some high-build and elastomeric masonry coatings are specifically designed to bridge minor surface cracks, but their limits differ by product.
Before deciding that a hairline crack is cosmetic, check whether it:
- Has grown since it was first noticed
- Reappeared after an earlier repair
- Runs diagonally from a window or door
- Has staining, white mineral deposits, or softness nearby
- Appears on both the interior and exterior
- Continues across several building materials
- Is surrounded by hollow or loose stucco
A photograph with a date and a small removable reference mark can help you monitor whether the crack changes. Do not insert rigid objects into the crack or permanently mark finished surfaces just to measure it.
In short: A stable hairline crack may not require extensive stucco replacement, but it still needs proper preparation and a compatible repair or coating system.
Signs the problem may be more than cosmetic
The term structural stucco cracks is often used too casually. A homeowner cannot confirm structural damage from a photograph or crack width alone.
A crack deserves further evaluation when it is widening, repeatedly returning, offset from one side to the other, or accompanied by sticking doors, uneven floors, displaced trim, interior drywall cracks, or visible building movement. Cracks associated with soft, stained, bulging, or hollow stucco may instead point to moisture intrusion, poor bonding, lath problems, or localized substrate failure.
Ask for a stucco specialist, qualified contractor, engineer, or other appropriate professional when:
- The crack continues to change.
- Opposite edges are no longer level.
- Several cracks form around the same opening.
- Stucco moves when lightly pressed.
- Large sections sound hollow.
- Water staining keeps returning.
- Interior damage appears in the same area.
- The crack returned after multiple repairs.
Paint should be postponed until the cause has been reasonably identified. Painting first can hide evidence that another contractor may need to inspect.
In short: A suspicious crack is not automatically structural, but repainting it before evaluation is the wrong order of work.
What is the best way to repair stucco cracks before painting?
The best way to repair stucco cracks before painting depends on the wall system and the repair product, but a professional process generally follows these stages.
1. Inspect and classify the damage
The contractor should inspect every elevation, not just the most visible wall. Cracks near windows, doors, roof-to-wall intersections, penetrations, control joints, parapets, and the base of the wall deserve close attention.
2. Determine why the crack formed
Surface shrinkage, thermal movement, impact, building settlement, water entry, poor installation, failed sealant, and old repairs require different responses. A patch will not last if the underlying movement or moisture source remains active.
3. Clean the wall and crack
Loose paint, chalk, dust, dirt, and weak stucco interfere with adhesion. Manufacturer repair instructions commonly begin with scraping or brushing away loose debris so the repair material can bond to a sound surface.
Pressure washing may be appropriate for some projects, but excessive pressure can damage weak stucco or drive water into cracks. Cleaning methods should match the condition of the wall.
4. Remove unstable material
Loose, flaking, or poorly bonded material should not remain beneath a new patch. Depending on the repair system, the crack may need to be opened or shaped so the material can make proper contact.
This is not a universal do-it-yourself instruction. Cutting too deeply can damage lath, flashing, a water-resistive barrier, sealant joints, or nearby drainage details.
5. Apply a compatible repair material
The repair product must match the size, depth, movement, and type of damage. Options may include:
- Paintable elastomeric crack filler
- Acrylic or polymer-modified stucco repair
- Cement-based stucco patch
- Base-coat and finish-coat reconstruction
- Replacement of damaged lath or accessories
- Flexible sealant at approved joints and transitions
Follow the product manufacturer’s instructions for crack preparation, maximum layer thickness, application temperature, drying, and curing. Manufacturer instructions for deeper repairs commonly require material to be built up in controlled layers rather than packed into one excessively thick application.
6. Match the existing texture
Stucco texture matching is one of the most visible parts of the repair. A structurally sound patch can still look poor if a smooth repair is placed in a lace, sand, dash, or knockdown finish.
The repair should be blended beyond the narrow crack where necessary, so the transition does not leave an obvious straight stripe.
7. Allow the repair to dry or cure
There is no single waiting period for every stucco product. Premixed acrylic repair, cement-based patch, fresh stucco, elastomeric filler, and masonry primer all have different requirements.
The repair must reach the condition specified by its manufacturer before priming or painting. Painting damp or insufficiently cured material can interfere with adhesion and produce uneven color or premature failure.
8. Prime repaired and porous areas
A suitable masonry primer or conditioner may be needed over bare, porous, chalky, alkaline, or repaired areas. Primer selection should be based on substrate conditions and the finish-coat manufacturer’s system, rather than on a generic “one primer works everywhere” rule.
9. Apply the correct exterior coating
Once the wall is clean, dry, sound, repaired, and properly primed, the contractor can apply the selected exterior stucco painting system at the specified coverage and film thickness.
In short: A lasting repair involves diagnosis, sound preparation, compatible material, texture matching, proper drying, primer where required, and only then paint.
Does elastomeric paint fix stucco cracks?
It can bridge certain small, stable cracks, but it does not repair loose stucco, correct structural movement, replace failed lath, or solve water entering through bad flashing.
Some online advice wrongly treats all elastomeric products as either a miracle repair or a moisture trap. Both claims are too broad. Modern masonry coatings vary in crack-bridging ability, thickness, vapor permeability, waterproofing performance, surface requirements, and application method. Some manufacturers specifically offer breathable elastomeric coatings that permit interior moisture vapor to escape.
An elastomeric coating may be suitable when:
- Cracks are fine, stable, and within the product’s rated limit
- Stucco is firmly bonded
- The wall is dry
- Moisture and drainage conditions have been evaluated
- The specified film thickness can be achieved
- The coating is compatible with the existing surface
It is not a substitute for repair when:
- Cracks are open, widening, or offset
- Stucco is hollow, soft, bulging, or separating
- Water is entering around windows, flashing, roofs, or penetrations
- Old patches are failing
- The drainage system is blocked
- The existing coating is poorly bonded
In short: Elastomeric paint is a coating option, not a universal crack-repair method.
Why Las Vegas stucco needs careful preparation
Las Vegas has abundant sunshine, triple-digit summer heat, long dry periods, strong winds, blowing dust, and seasonal monsoon storms. The region’s sharp temperature changes can also be noticeable during spring and fall.
These conditions do not prove why a particular wall cracked, but they make product selection, cleaning, repair compatibility, application temperature, and drying conditions especially relevant for Las Vegas stucco painting.
Local preparation should account for:
- Chalky or faded existing coatings
- Dust lodged in textured surfaces
- Intense sun exposure on south- and west-facing walls
- Cracks around windows, doors, parapets, and wall penetrations
- Irrigation hitting the lower wall
- Monsoon-driven rain entering failed joints
- Paint applied outside the manufacturer’s temperature range
- Patches drying too quickly in hot, dry conditions
A painter should schedule the work around surface temperature and the coating manufacturer’s instructions, not simply the time of day or air temperature.
In short: The desert climate does not change the basic repair process, but it gives contractors less room for careless preparation or improper application.
Questions to ask before approving a stucco painting estimate
A vague estimate stating “prep and paint exterior” does not tell you whether meaningful repairs are included.
Ask the contractor:
- Which cracks are included in the estimate?
- Are any cracks showing movement or moisture warning signs?
- What repair material will be used?
- Will failed caulk or old patches be removed?
- How will the existing texture be matched?
- How long must the repairs dry or cure?
- Which areas will receive masonry primer?
- What coating system is being proposed?
- Is the coating approved for the existing surface?
- Are weep screeds, control joints, and drainage openings being kept clear?
- Will repairs remain visible after spot painting?
- Would painting an entire wall produce a more uniform finish?
Requesting a written repair scope makes bids easier to compare. It also prevents disagreements over whether crack filling, patching, texture work, primer, and full-wall repainting were actually included.
Frequently asked questions
Yes. We help homeowners choose colors and finishes that fit their home and can apply a test patch before committing to the full project.
Repair the stucco before investing in new paint.
So, should stucco cracks be repaired before painting? In most cases, they should at least be evaluated and properly treated first. Stable hairlines may need limited preparation, while active cracks, loose stucco, moisture staining, failed patches, and movement-related damage require a real repair plan.
Do not pay for a fresh exterior finish that simply covers defects for a short time. Ask for a written scope showing which cracks will be repaired, which materials will be used, how the texture will be matched, and when the repaired surface will be ready for primer and paint.
Accent Painting of Las Vegas has served the Las Vegas Valley since 1969 as a family-owned painting company offering residential, commercial, multi-family, HOA, and stucco repainting services.
Contact Accent Painting of Las Vegas to schedule an exterior evaluation and get a free quote for Las Vegas stucco repair, surface preparation, and professional painting.