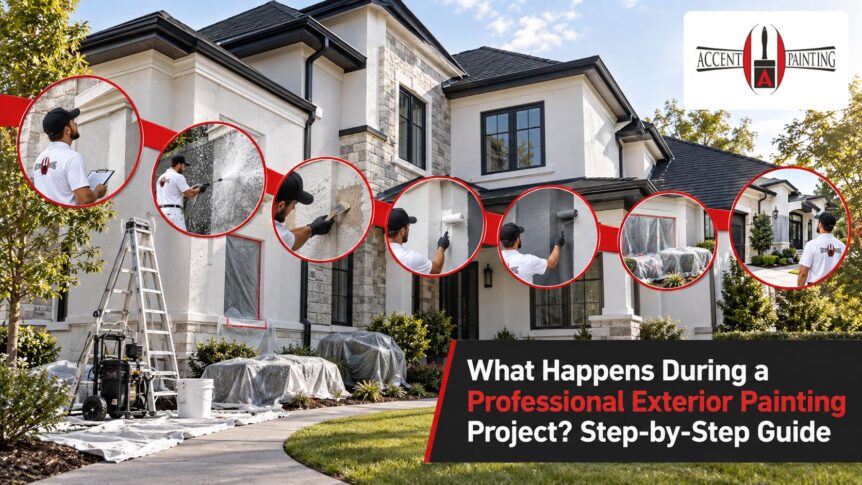
A professional exterior painting project normally includes property inspection, written scope development, cleaning, surface repairs, scraping, sanding, caulking, priming, paint application, cleanup, and a final walkthrough. The exact process changes according to the building material, existing coating, accessibility, weather, and amount of damage.
Professional painting is not simply adding a new color over the old one. Most of the work that determines coating performance happens before the finish paint is applied.
The exterior house painting process at a glance
This overview shows what property owners should expect during each stage.
Project stage | What the painting contractor does | What the property owner can expect |
Inspection | Reviews surfaces, damage, access, and existing coatings | Questions about colors, repairs, and priorities |
Written proposal | Defines preparation, products, coats, and exclusions | A scope that can be reviewed before approval |
Scheduling | Confirms work dates and weather considerations | Instructions for vehicles, pets, landscaping, and access |
Property protection | Covers or masks adjacent surfaces | Temporary coverings and controlled work areas |
Cleaning | Removes dust, dirt, chalk, and loose contamination | Wet exterior surfaces that need drying time |
Repairs | Addresses stucco, caulk, wood, or metal issues | Repair areas may look different until primed and painted |
Priming | Treats bare, repaired, stained, or difficult surfaces | Not every previously painted surface requires full priming |
Painting | Applies specified finish coatings | Brush, roller, spray, or a combination may be used |
Inspection | Checks coverage, details, cleanliness, and scope | Opportunity to identify legitimate corrections |
Final closeout | Removes materials and reviews completed work | Product and maintenance information where provided |
In short: The visible paint application is only one part of the project. Inspection and preparation determine whether the new coating has a stable surface to bond to.
Step 1: Inspecting the property and defining the scope
A proper house painting inspection begins with a walk around the property. Each elevation should be evaluated separately because sun exposure, irrigation, wind, and surface condition may differ.
The contractor may inspect:
- Stucco cracks and failed patches
- Peeling or chalky paint
- Exposed or weathered wood
- Failed caulk around doors and windows
- Rust on metal surfaces
- Water staining
- Damaged fascia or trim
- Previous coating repairs
- Areas that are difficult to access
- Surfaces receiving heavy afternoon sun
The inspection should distinguish between work the painter can handle and repairs that require another trade. Active leaks, substantial wood deterioration, recurring structural cracks, and damaged building components should not simply be covered with paint.
What should the exterior painting estimate include?
A clear exterior painting estimate should identify:
- Buildings and surfaces included
- Surfaces excluded
- Cleaning method
- Preparation and repair work
- Primer and finish products
- Number of coats
- Colors and sheen
- Access equipment
- Protection and masking
- Approximate project sequence
- Cleanup responsibilities
- Change-order procedures
“Prepare and paint exterior” is too vague. It does not explain whether loose paint, stucco cracks, rust, caulk, primer, doors, trim, or perimeter walls are included.
Step 2: Confirming colors, products, and scheduling
Colors and products should be confirmed before materials are ordered. Color names alone are not enough because different product lines can use the same or similar color names.
The contractor should document:
- Paint manufacturer
- Product line
- Color name and code
- Sheen
- Surface where each product will be used
- Primer where required
- Approved color samples
Small color chips can look different when applied across a large exterior wall. Reviewing a sample under morning and afternoon light can help property owners make a more informed decision.
HOA-managed properties may require written color approval before work begins. That approval should be completed before paint is purchased.
How long does exterior painting take?
The schedule depends on property size, crew size, repairs, access, weather, drying time, and coating requirements. An estimate made without inspecting the property is unlikely to account for all of those factors.
The contractor should provide a projected schedule while explaining which conditions could change it. A rushed promise is less useful than a realistic sequence with allowances for repairs and weather.
Step 3: Preparing the property for painters
The contractor should explain what needs to be moved or secured before the crew arrives.
A practical homeowner checklist includes:
- Move vehicles away from the building
- Remove patio furniture and decorations
- Clear items from balconies and walkways
- Trim plants that block wall access
- Secure pets indoors
- Close windows during cleaning and spraying
- Unlock gates when requested
- Identify working water and electrical access
- Turn off sprinklers near active work areas
- Remove fragile items attached to exterior walls
- Confirm which doors must remain usable
Satellite dishes, security cameras, electrical equipment, mounted fixtures, and other attached items should be discussed before work starts. Do not assume the painting crew will remove or reinstall them unless that work appears in the proposal.
Clear preparation instructions reduce delays and limit the risk of damage.
Step 4: Protecting landscaping and adjacent surfaces
Before cleaning or painting, the crew should protect surfaces that are not included.
Protection may cover:
- Windows and glass
- Light fixtures
- Roofing materials
- Pavers and concrete
- Outdoor furniture
- Air-conditioning equipment
- Decorative stone
- Landscaping
- Vehicles near the work area
- Doors or walkways that must remain open
Coverings around plants should not be left in a way that traps excessive heat for extended periods. Protection may need to be removed or adjusted at the end of each workday.
For spray application, masking and wind monitoring are especially important. Overspray can travel beyond the immediate wall when conditions are unsuitable.
Step 5: Cleaning exterior surfaces
Paint does not bond reliably to heavy dust, loose chalk, dirt, mildew, grease, or flaking material. Cleaning creates a more stable surface for repairs, primer, and finish coatings.
Pressure washing before painting may be appropriate for certain exteriors, but maximum pressure is not the goal. Excessive pressure can damage stucco, scar wood, loosen sound coatings, or force water into gaps.
The cleaning method should match the material. Some areas may require lower pressure, hand cleaning, or another surface-appropriate method.
Does the building need to dry after washing?
Yes. Paint should not be applied to a surface that is still holding moisture.
Drying time depends on the material, weather, shade, wall thickness, and how much water entered cracks or porous areas. A surface that feels dry on the outside may still hold moisture beneath the surface.
In short: Washing and painting should not automatically occur back-to-back. The surface must be sufficiently clean, dry, and stable first.
Step 6: Repairing and preparing the surfaces
Exterior painting preparation usually takes longer than many property owners expect. This stage removes unstable material and corrects included defects before they are hidden by the finish coat.
Preparation may include:
- Scraping loose paint
- Sanding rough edges
- Repairing suitable stucco cracks
- Patching minor surface damage
- Replacing failed caulk
- Treating exposed fasteners
- Removing rust
- Priming bare wood
- Sealing stains
- Cleaning chalky surfaces
- Dulling glossy coatings where required
Stucco repairs
Stucco repair and repainting should be treated as connected steps. Paint cannot stabilize loose stucco or permanently bridge every crack.
Minor, stable cracks may be repairable during preparation. Wider, recurring, or moisture-related cracks may require further evaluation.
Repair materials must be compatible with the existing wall and allowed to cure according to their instructions. Painting uncured repairs can affect appearance and adhesion.
Wood preparation
Peeling paint should be removed until the remaining edges are stable. Exposed wood may need sanding and an appropriate primer.
Soft, rotten, or structurally damaged wood should not be disguised with filler and paint. The damaged material may need to be repaired or replaced before painting continues.
Caulking
Caulk may be used around certain joints, trim transitions, doors, and windows. However, drainage openings, weep points, and joints designed to remain open should not be sealed indiscriminately.
A contractor should understand which gaps require sealant and which serve a building function.
Step 7: Applying the correct primer
Exterior paint primer helps finish paint bond to specific surfaces and can reduce uneven absorption. It is not automatically required across every inch of a sound, previously painted exterior.
Primer may be needed on:
- Bare wood
- New or repaired stucco
- Exposed metal
- Rust-treated areas
- Patched surfaces
- Stained areas
- Glossy or difficult coatings
- Surfaces requiring improved adhesion
Different materials may require different primers on the same property. A masonry primer should not be assumed to work on bare metal, and a general-purpose primer may not be suitable for every stain or coating.
Ask the contractor whether the proposal includes full priming, spot priming, or a self-priming finish product. Those are not the same scope.
Step 8: Applying the finish paint
The correct exterior paint application method depends on the surface, product, access, nearby property, and desired finish.
Professional painters may use:
- Brushes for edges and detailed areas
- Rollers for walls and textured surfaces
- Sprayers for controlled coverage across larger areas
- Spray-and-back-roll methods on suitable porous or textured surfaces
- A combination of methods across one project
Spraying is not automatically careless, and rolling is not automatically better. Either method can produce poor results when preparation, coverage, weather, or technique is inadequate.
How many coats of exterior paint are required?
There is no honest universal answer. The number of coats depends on:
- Existing and new colors
- Surface porosity
- Paint condition
- Product specifications
- Application method
- Repairs and primer
- Required film thickness
- Whether the substrate is bare or previously coated
The number of finish coats should be stated in the proposal. Primer should not automatically be counted as a finish coat.
Las Vegas application conditions
For exterior painting in Las Vegas, crews must consider more than the forecasted air temperature. Direct sunlight can make the wall considerably hotter than the surrounding air.
Painters may need to work on shaded elevations, begin earlier, and move around the property as sun exposure changes. Wind and blowing dust can also affect spraying, surface cleanliness, and the wet coating.
The product’s technical data should guide acceptable air temperature, surface temperature, drying time, and recoat time.
In short: Professional application means following the coating system and actual surface conditions not simply painting whenever the day is dry.
Step 9: Daily communication and site cleanup
A professional crew should not leave the property disorganized at the end of each workday.
Daily closeout may include:
- Securing ladders and equipment
- Removing debris
- Storing materials safely
- Reopening required walkways
- Marking wet surfaces
- Checking gates
- Reporting completed work
- Explaining the next day’s work area
- Identifying new repairs or schedule changes
Homeowners should know who to contact with questions. Giving instructions to several crew members can create confusion, so one project lead should manage scope and change requests.
If additional damage is uncovered, the contractor should explain it and obtain approval before adding work. Verbal additions without a documented scope can cause disputes.
Step 10: Final inspection and project closeout
An exterior painting walkthrough should compare the completed property with the written proposal.
The review should confirm:
- Included surfaces were painted
- Coverage is consistent
- Repairs are complete
- Trim lines and transitions are clean
- Doors and windows operate properly
- Fixtures and glass are clean
- Masking materials have been removed
- Landscaping and hardscaping are clear
- Approved corrections are completed
- Remaining paint is identified, if provided
Inspect walls from a normal viewing distance and under reasonable lighting. Exterior coatings applied over textured stucco will not make the substrate perfectly smooth.
The contractor should also explain when sprinklers, washing, or routine contact can resume.
Drying and curing are different.
Paint can feel dry before it has reached full paint curing time. The coating may remain vulnerable to abrasion, sticking, washing, or impact while it continues to cure.
Cure time depends on the product, weather, humidity, color, surface, and film thickness. Follow the product-specific guidance rather than assuming every coating cures on the same schedule.
Frequently asked questions
The contractor inspects the property, confirms the scope, protects surrounding areas, cleans and repairs surfaces, primes where needed, applies finish paint, cleans the site, and completes a final walkthrough.
Move vehicles and outdoor furniture, secure pets, clear balconies and walkways, trim obstructing plants, turn off nearby sprinklers, close windows, and provide requested gate access.
Every surface needs appropriate cleaning, but high-pressure washing is not right for every material. The contractor should choose a cleaning method that removes contamination without damaging the building.
Many painters handle minor or moderate stucco repairs as part of preparation. Large, recurring, structural, or moisture-related damage may require further evaluation or another trade.
No. Primer is commonly used on bare, repaired, stained, rusty, or difficult surfaces. Sound, compatible existing paint may not require full priming.
Yes, when air and surface temperatures remain within the product’s application limits. Direct sunlight, hot walls, wind, dust, drying time, and crew scheduling must be managed.
That depends on the coating, weather, and cure conditions. The contractor should provide product-specific guidance before irrigation resumes near freshly painted walls.
Planning a professional exterior painting project
A well-managed professional exterior painting project follows a defined sequence: inspect, protect, clean, repair, prime, paint, inspect, and close out. Skipping or rushing preparation may shorten the process, but it does not create a better coating system.
Accent Painting of Las Vegas has served Southern Nevada since 1969. Its licensed, insured, and bonded team handles exterior house painting, stucco repair, commercial exteriors, HOA properties, multi-family communities, and related preparation throughout Las Vegas, Henderson, and the Las Vegas Valley.
Contact Accent Painting of Las Vegas to schedule an exterior inspection and receive a clear painting scope for your property.