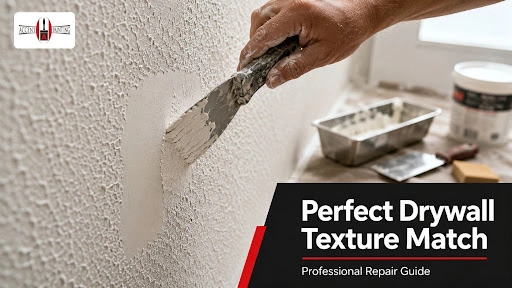
To match drywall texture after repairs, professional painters first identify the original texture, prepare the patch until its edges are flat, test the application method, and gradually blend new material into the surrounding wall. They then prime the repaired area and match the paint color, sheen, roller pattern, and coverage so the patch does not stand out.
That final point matters. A repair can have the correct texture and remain visible because fresh joint compound absorbs paint differently, the sheen does not match, or the new roller pattern contrasts with the older surface.
Why a Drywall Repair Can Remain Visible
A newly repaired section of drywall usually starts as a flat, porous surface. The surrounding wall may have years of paint buildup, roller stipple, texture material, minor wear, and fading.
When those surfaces respond differently to light, the repair may appear as a shadow, smooth spot, raised outline, or patch with a different level of shine. Common causes include:
- Texture that is too heavy or too light
- Hard edges around the patch
- Uneven sanding
- A raised or recessed repair
- Incorrect paint sheen
- Missing primer
- A brush finish surrounded by roller stipple
- Paint that no longer matches the aged wall
- Strong side lighting that exposes surface differences
Professional painters assess the wall as a complete visual surface rather than treating the hole as the only problem. Texture pattern, depth, porosity, paint sheen, and lighting can all affect whether a repair remains noticeable.
In short: A visible drywall patch is not always caused by poor patching. The texture, primer, paint, roller finish, and surrounding wall condition must also match.
What Professionals Examine Before Matching the Texture
Before applying new material, painters study the existing finish closely. Simply identifying a wall as “orange peel” or “knockdown” is not enough because each texture can have different sizes, densities, depths, and application patterns.
Texture type
The painter determines whether the surface has:
- Orange peel
- Knockdown
- Skip trowel
- Slap brush
- Popcorn or acoustic texture
- Sand texture
- A smooth finish
- Ordinary roller stipple rather than a separate texture coating
Pattern size and density
Orange peel, for example, may be fine, medium, or heavy. A spray pattern with the right general appearance can still look wrong if the droplets are larger or more tightly grouped than those on the original wall.
Direction and application marks
Hand-applied finishes often have a direction. Trowel arcs, brush marks, flattened peaks, and irregular spaces need to follow the character of the existing surface.
Layers of previous paint
Repeated repainting can soften an older texture by filling its smaller gaps. Applying a sharp new texture beside a heavily painted surface can make it look newer even when the original pattern has been copied.
Lighting
Painters inspect the repair from several angles. A patch that looks acceptable under overhead lighting may become obvious when daylight moves across the wall from a nearby window.
In short: Accurate drywall texture matching starts with studying the existing wall, not selecting a spray can based only on the texture name.
How Professionals Match Drywall Texture After Repairs
The professional process usually follows these stages.
1. Correct the source of the damage
Before cosmetic work begins, the cause of the damage must be addressed. A painter should not close and refinish drywall while a plumbing leak, roof leak, moisture problem, or structural movement remains unresolved.
Otherwise, the stain, crack, or damaged section may return.
2. Remove loose or damaged material
Unstable drywall, crumbling compound, torn paper, loose tape, and damaged edges are removed. Larger openings may require a properly supported drywall patch rather than filler alone.
3. Tape and fill the repair
Joint tape and joint compound are applied where required. Instead of creating a thick mound directly over the damage, the compound is spread outward in increasingly thin layers.
This wide transition helps prevent the outline of the patch from showing after painting.
4. Sand and inspect the surface
Once the compound has dried, the repair is sanded to remove ridges, high spots, tool marks, and hard edges. A work light may be held at a low angle to reveal flaws that ordinary room lighting hides.
The patch should be structurally sound and level before texture is applied. Texture should not be used to hide poor drywall finishing.
5. Create a test sample
Professionals often test the texture on scrap drywall or cardboard before working on the repaired wall. They adjust:
- Material consistency
- Spray pressure
- Nozzle setting
- Distance from the surface
- Application speed
- Drying time
- Trowel or knife pressure
Testing reduces the risk of applying an overly heavy texture that later has to be removed. Test applications and gradual buildup are commonly recommended because it is easier to add material than correct an overloaded patch.
6. Apply the texture lightly
The first application is usually kept slightly lighter than the surrounding texture. The painter can then add material where needed instead of trying to flatten or scrape away an excessive application.
7. Feather the edges
To feather drywall texture, the application becomes progressively lighter as it moves away from the center of the repair. The transition is spread beyond the exact patch boundary so the eye does not see a defined circle, square, or rectangle.
8. Allow the texture to dry
Texture must dry adequately before it is sanded, primed, or painted. Applying paint too early can soften the pattern or create inconsistent absorption.
9. Prime the repaired area
A suitable drywall primer seals the porous joint compound and helps create a more uniform surface for the finish paint. Spot-priming patched areas is a recognized method for reducing uneven sheen caused by differences in porosity.
10. Match the finish paint
The painter evaluates the color, sheen, application method, roller nap, and condition of the surrounding paint. In some rooms, the most reliable solution is repainting the complete wall from corner to corner.
In short: The professional method is repair, feather, sand, test, texture, blend, dry, prime, and paint. Skipping one stage can leave the patch visible.
How Matching Methods Change by Texture Type
Different finishes require different application tools and timing.
Texture type | How it is matched | Common reason the repair shows |
Orange peel | Sprayed in controlled droplets, usually after testing distance and nozzle settings | Droplets are too large, small, heavy, or closely spaced |
Knockdown | Material is sprayed and allowed to set briefly before the peaks are flattened | Texture is knocked down too early, too late, or with excessive pressure |
Skip trowel | Joint compound is applied by hand in irregular sweeping patterns | New marks look too repetitive or move in a different direction |
Slap brush | A brush is pressed and lifted to reproduce the existing pattern | Brush size, compound thickness, or spacing does not match |
Smooth finish | The area is skimmed, sanded, inspected, primed, and painted | Ridges, low spots, sanding scratches, or paint flashing remain visible |
Popcorn or acoustic | Compatible texture material is sprayed or carefully dabbed into the repair | Density, projection, or paint buildup differs from the surrounding ceiling |
Matching orange peel
For an orange peel texture repair, painters control the droplet size by adjusting material consistency, air pressure, nozzle size, spray distance, and movement speed.
The edges are sprayed more lightly so the new pattern fades into the old texture instead of ending abruptly.
Matching knockdown
A knockdown texture repair depends heavily on timing. After the material is sprayed, the painter waits until the peaks have partially set and then lightly drags a broad knife across them.
Knocking the material down too soon can smear it. Waiting too long can make it difficult to flatten without creating rough edges.
Matching a smooth wall
A smooth wall repair can be less forgiving than a textured finish. Even a shallow ridge or sanding mark can become visible after painting, especially on walls exposed to side lighting or higher-sheen paint.
The solution may require multiple thin skim coats rather than one thick application.
A safety note about older ceiling textures
Some older ceiling materials may contain asbestos. Suspected material should not be scraped, sanded, drilled, or sampled casually. The EPA advises that potentially asbestos-containing materials should generally be left undisturbed and that sampling should be performed by a trained, accredited professional when testing is necessary.
Why Primer and Paint Matching Matter
Texture is only one part of paint matching after drywall repair.
Fresh joint compound is more porous than a previously painted wall. Without primer, the patch may absorb the finish coat differently, producing a dull or shiny area known as paint flashing after drywall repair.
Sherwin-Williams describes flashing as an uneven difference in gloss, sheen, or luster. Potential causes include coating over a porous surface, applying uneven film thickness, or using insufficient paint coverage. Its recommended solutions include priming or sealing the surface, spot-priming patched areas, and applying another coat where needed.
Professional painters also consider the following factors.
Paint color
Paint stored from the original project may not produce a perfect touch-up. The wall may have faded, accumulated residue, or changed slightly through previous cleaning and exposure.
A color sample can help identify a close formula, but the final result still needs to be evaluated after drying.
Paint sheen
Flat, matte, eggshell, satin, semi-gloss, and gloss finishes reflect light differently. A correct color in the wrong sheen can make a patch obvious.
Roller nap
The roller itself leaves a subtle pattern. A very smooth roller finish placed inside a wall painted with a heavier nap can reveal the repaired area.
Application method
A brushed touch-up surrounded by a rolled finish may create different marks. Professionals normally reproduce the surrounding application method.
Wall-to-wall coverage
Touch-up painting works best when the existing paint is relatively recent, the exact product is available, and the wall has not faded or accumulated wear.
When those conditions are absent, repainting from one natural break to another is usually more predictable.
In short: Primer controls absorption, while the correct color, sheen, roller, and coverage area control the final appearance.
Should the Patch or the Entire Wall Be Repainted?
The complete wall does not always need repainting. However, restricting the work to a small patch is not automatically the least expensive or most attractive choice.
Spot painting may work when:
- The repair is small
- The surrounding paint is in good condition
- The exact paint product and sheen are known
- The wall has not noticeably faded
- The texture match is accurate
- The patch is located in a low-visibility area
Repainting the full wall may be better when:
- The paint is old or faded
- The wall receives strong side lighting
- Several repairs are present
- The existing color cannot be matched reliably
- The finish has noticeable wear or stains
- The paint sheen is higher than flat or matte
- Previous touch-ups are already visible
- The repair occupies a large part of the wall
Painting from corner to corner gives the painter natural stopping points and reduces the chance of seeing a halo around the repaired section.
For walls with repeated damage, inconsistent texture, or several previous patches, a full skim coat or complete retexturing may produce a cleaner result than blending each repair separately.
DIY Texture Matching vs. Professional Repair
Small cosmetic repairs can be reasonable DIY projects. Larger or highly visible damage is less forgiving.
Situation | DIY may be reasonable | Professional help is usually better |
Tiny nail or anchor holes | Yes | Optional |
Small patch in a closet | Often | Optional |
Large drywall opening | Difficult | Recommended |
Ceiling repair | Messy and difficult | Recommended |
Water-damaged drywall | Source must be diagnosed | Recommended |
Knockdown or hand-troweled texture | Requires practice | Recommended |
Repair in strong natural light | Minor flaws may show | Recommended |
Multiple previous patches | Spot repairs may look uneven | Recommended |
Suspected asbestos-containing texture | Do not disturb casually | Qualified testing and remediation professionals |
A homeowner considering Can you match orange peel texture yourself? should first test the spray on scrap material. If the droplets, coverage, or edge transition do not resemble the wall, continuing directly on the repair will usually make correction harder.
A small error can often be sanded and reapplied. A heavy application over a large wall or ceiling may require removing the new texture and starting again.
Common Drywall Texture Matching Mistakes
Applying texture over an uneven patch
Texture does not correct raised tape, deep sanding scratches, or an improperly supported repair. Those defects usually remain visible after painting.
Making the repair area too small
Keeping compound and texture directly inside the damaged area can create a hard outline. Professional repairs are often blended across a wider area to soften the transition.
Skipping the test application
Spray distance, product consistency, and nozzle settings significantly affect the finished pattern. Testing on the wall itself turns the actual repair into an experiment.
Applying too much material
Heavy texture is harder to blend and may create an obvious mound. A light first application provides more control.
Ignoring roller stipple
Even when the drywall material matches, using a different roller nap can leave the repaired section smoother or rougher than the surrounding wall.
Painting without primer
Raw joint compound may absorb finish paint unevenly, producing a dull patch or a different sheen.
Judging the repair while it is still wet
Texture, primer, and paint can all look different after drying. A repair should be evaluated after the materials have cured according to their product instructions.
Assuming old paint will touch up perfectly
The original can of paint may still be usable, but the wall itself may have changed. When a touch-up remains visible, repainting the full wall may be the more sensible fix.
What to Expect From a Professional Drywall and Painting Service
A dependable professional drywall repair process should include more than filling the damaged spot.
Ask whether the contractor will:
- Identify and document the existing texture
- Protect floors, furniture, fixtures, and nearby rooms
- Remove unstable material
- Properly support larger patches
- Feather the joint compound beyond the repair
- Test the texture application
- Match texture density and direction
- Prime the repaired material
- Match the paint sheen and roller finish
- Explain whether spot painting is realistic
- Inspect the wall under practical room lighting
- Complete a final walkthrough
Honest contractors should also tell you when an exact spot repair is unlikely to disappear. Repainting or retexturing a larger area is sometimes the more reliable option.
Drywall Texture Repair in Las Vegas
For homeowners, property managers, HOAs, apartment communities, and commercial properties, a repair needs to look consistent with the rest of the room, not merely cover the damaged drywall.
Accent Painting of Las Vegas provides painting, surface preparation, and drywall repair support for residential and commercial properties throughout Las Vegas, Henderson, and surrounding Southern Nevada communities. The family-owned, third-generation company has served the Las Vegas Valley since 1969 and works with both residential and commercial painting projects.
For Las Vegas drywall texture repair, the team can assess the damaged area, explain whether localized blending is practical, and recommend the appropriate preparation and repainting scope without pretending every old wall can be perfectly touched up.
Frequently Asked Questions
A very close match is often possible, but an exact match cannot honestly be promised in every situation. Age, previous paint layers, hand-applied patterns, fading, repairs, and lighting can make an older finish difficult to duplicate perfectly.
Repainting or retexturing a larger section may provide a more uniform result.
A homeowner may be able to handle a small wall texture repair using an adjustable aerosol product and a test board. The difficulty is matching the droplet size, density, spray distance, and feathered edge.
Large patches, ceilings, and high-visibility walls are less suitable for trial-and-error work.
Professional help is sensible for large openings, water damage, damaged seams, ceiling repairs, hand-applied textures, repeated cracks, high-visibility walls, or repairs that have already been attempted without success.
Suspected asbestos-containing ceiling material should not be disturbed before appropriate professional assessment.
Restore the Wall, Not Just the Damaged Spot
To match drywall texture after repairs, the patch must blend in shape, depth, texture density, paint absorption, color, sheen, and roller finish. Treating only the hole while ignoring the surrounding wall is the main reason many repairs remain visible.
Accent Painting of Las Vegas combines drywall preparation with professional interior painting, allowing the repaired area and finish coat to be planned as one project. Call the team, request a free quote, or schedule an assessment for your Las Vegas or Henderson property.